Lip Filler Before and After in Santa Ana, South Coast Metro: Day-by-Day Guide
Thinking about lip filler? This guide shows lip filler before and after results, explains the healing process, and shares expert advice so you feel calm and confident. At Calista Aesthetics, we are located in Santa Ana, South Coast Metro, convenient to Costa Mesa and Irvine with easy parking.
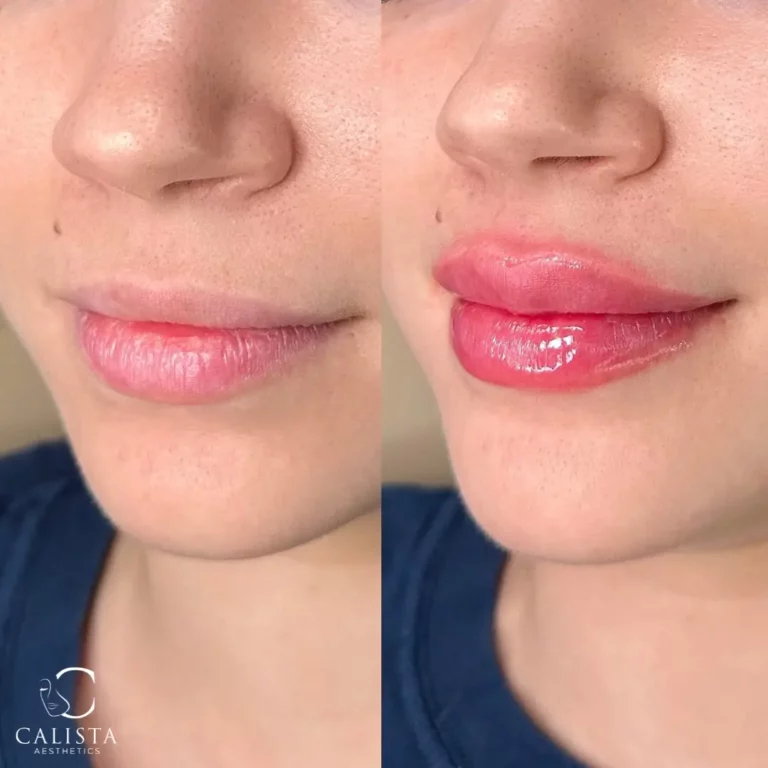
Close-up lip filler before and after photos
Photos tell the truth. Browse our gallery to see subtle definition, balanced volume, and refreshed smiles. Each image was taken in the same light with no filters. Pay attention to:
A hydrated, pillowy look—not a hard “duck lip.”
Enhanced Cupid’s bow and defined borders.
How filler lifts drooping lip corners in some patients.
Timeline: swelling-to-settling day-by-day
Day 0 – Treatment
A topical numbing cream keeps you comfortable. Tiny injections place hyaluronic-acid gel where you need fullness most. Expect slight stinging that fades fast.
Day 1 – Early puffiness
Lips feel firm and look 10–20 % larger. Use cold compresses and sleep with your head raised.
Day 2 – Peak swelling & possible bruises
This is the most dramatic day, but it is normal. According to the American Society of Plastic Surgeons, swelling usually peaks within 48 hours and then eases quickly.
Day 3–4 – Deflate & soften
You may feel tiny bumps; gentle massage (if your injector approves) smooths them out.
Day 5–7 – Shape reveals
Most swelling is gone. Color looks even, texture feels like natural lip tissue.
Week 2 – Final result
Filler has fully integrated with water molecules in your skin. Time to enjoy your new, balanced pout!
Tips for the most natural-looking results
Start small. Half-syringe sessions layered over time prevent over-filling.
Choose HA fillers designed for lips (e.g., Restylane Kysse, Vollure) for softness.
Follow after-care—no intense workouts, saunas, or hot drinks for 24 hours.
Hydrate inside and out. Drink water and use a simple balm to lock in moisture.
Partner with a skilled injector. Our injectors know facial anatomy and use proven techniques for seamless curves.
Common mistakes and how to avoid them
Over-projection. Asking for “one full syringe” at once can push lips past natural proportions.
Fix: Build volume gradually.Ignoring facial balance. Lush lips need matching chin and cheek support.
Fix: Ask about chin filler or Botox-lip flip to harmonize the lower face.Skipping touch-ups. Waiting until filler is fully gone means more product later.
Fix: Maintain with mini-refills every 8–12 months.
When to schedule a touch-up
Most HA lip fillers last 6–12 months, but metabolism, lifestyle, and product choice vary. Plan a check-in at the 6-month mark. A quick 0.3–0.5 mL boost keeps shape crisp and prevents a full regression phase.